Introduction to Smart Light Switch Dimmers
In the era of smart homes, the smart light switch dimmer has become a staple for its convenience and energy savings. These devices allow you to adjust the brightness of your lights and often come with features like remote control, programming, and integration with home automation systems. They contribute to a comfortable ambiance and can even help reduce your electricity bill.
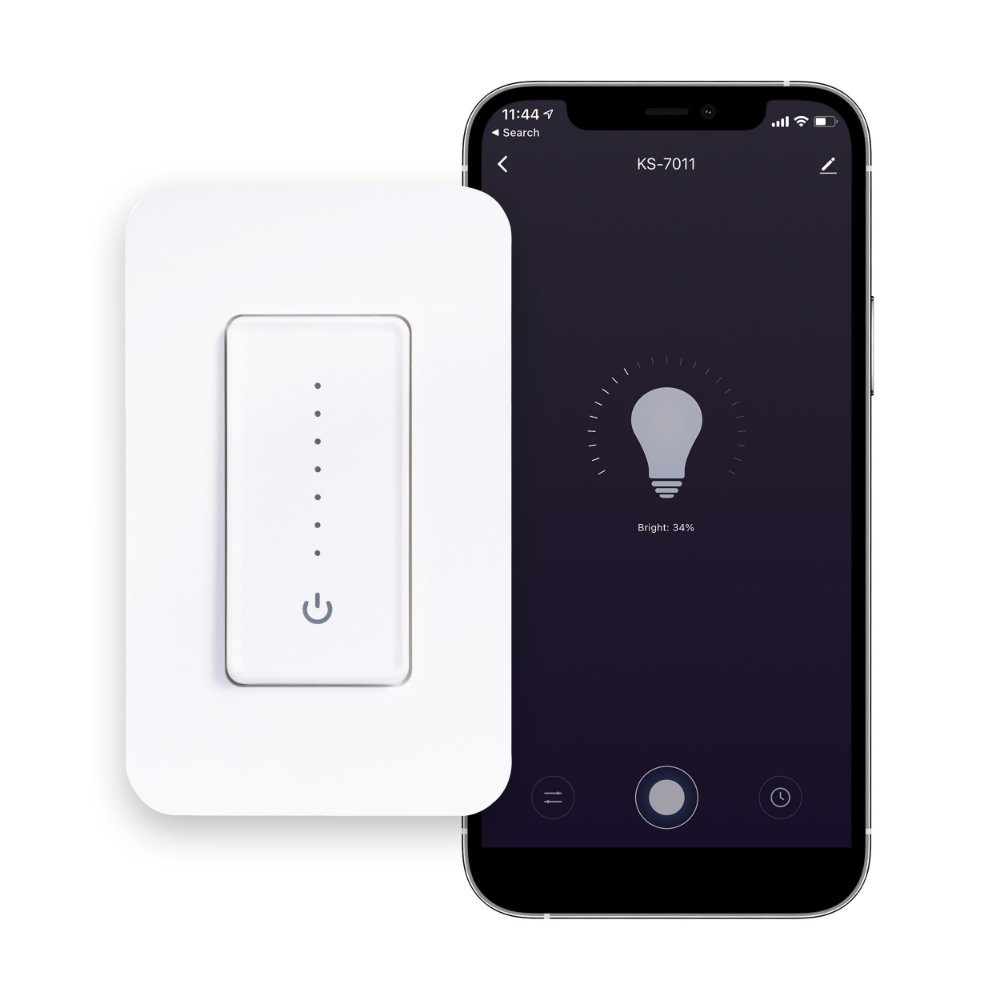
A smart light switch dimmer replaces your traditional light switch with an intelligent, customizable control. It fits into the existing electrical box in your wall and connects to your home’s Wi-Fi network. This connection enables you to manage your lighting via smartphone apps or voice commands through smart home assistants. The incorporation of smart light switch dimmers into your home requires a clear understanding of the installation process. With the right tools and a bit of know-how, you can install these devices yourself.
In the following sections, we’ll provide you with a comprehensive guide covering all you need to know before, during, and after the installation of your smart light switch dimmer. From the pre-installation checklist to troubleshooting common issues, our goal is to ensure a smooth and safe installation experience. Keep reading to discover how you can upgrade your home lighting system with ease.

Pre-Installation Checklist
Before you begin the installation of your smart light switch dimmer, it is crucial to follow a pre-installation checklist. This checklist ensures that you have everything in place for a successful installation. Here are the steps you need to take:
- Confirm Compatibility: Ensure that the smart light switch dimmer is compatible with your home lighting system and bulbs.
- Gather Tools: Assemble all the necessary tools including a screwdriver, wire stripper, and voltage tester.
- Turn Off Power: Always start by turning off the power at the circuit breaker to prevent electric shock.
- Check the Wiring: Examine your existing switch’s wiring to make sure it meets the smart dimmer’s requirements.
- Understand Your Wiring Setup: Identify if you have a single-pole or 3-way switch setup as this affects how you’ll install the dimmer.
- Review the Manual: Read the smart dimmer’s installation guide thoroughly for specific instructions.
- Plan the Installation: Decide on the best time for installation when household activity is minimal.
- Safety Inspection: Perform a quick safety check to ensure all tools and components are free from damage.
Taking the time to complete these pre-installation steps will save you time and help avoid any complications during the setup of your smart light switch dimmer. Remember, safety comes first, so do not rush through these checks.
Step-by-Step Installation Process
Installing your smart light switch dimmer involves several clear steps. Let’s break down the entire process:
- Turn Off Power: Begin by turning off the main power at your circuit breaker. This ensures safety from electrical hazards.
- Remove Old Switch: Use a screwdriver to remove the faceplate from your existing switch. Then, unscrew and carefully pull out the old switch.
- Inspect Wiring: Check the wires for any signs of wear or damage. Confirm that you have all the necessary wires for the new smart dimmer installation.
- Connect the Dimmer: Attach the corresponding wires from the smart dimmer to the matching wires in the wall. Typically, these include live (hot), neutral, and ground wires. Follow the wiring diagram provided in your installation manual.
- Secure the Dimmer: Push the smart dimmer into the wall box and screw it securely into place. Ensure that all connections remain tight and secure.
- Attach the Faceplate: Snap or screw on the new faceplate that comes with the smart dimmer.
- Restore Power: Turn the power back on at your circuit breaker. Test the dimmer to see if it operates correctly.
- Set up App or Voice Control: Pair the smart dimmer with your preferred mobile app or smart home system for voice control. Follow the app’s setup instructions to customize your settings.
By following these steps, you should have a fully functioning smart light switch dimmer that enhances the convenience and functionality of your home’s lighting system.

Safety Tips and Best Practices
When installing a smart light switch dimmer, safety is paramount. To ensure a smooth and secure installation process, adhere to these best practices:
- Double-Check Power Is Off: Use a voltage tester to confirm the power is off before touching any wires.
- Wear Protective Gear: Put on safety glasses and gloves to protect yourself from electrical sparks and sharp objects.
- Secure Connections: Ensure that all wire nuts and connections are tight to prevent any loose wires, which may cause electrical fires.
- Avoid Water Exposure: Keep the installation area dry. Never handle electrical devices with wet hands or near water to prevent the risk of shock.
- Use Correct Tools: Utilizing the proper tools, like wire strippers and screwdrivers, helps prevent accidents and ensures the dimmer is installed correctly.
- Follow Manufacturer Instructions: Stick to the guide provided with your smart light switch dimmer for any specific safety advice or installation steps unique to the product.
- Test GFCI Outlets: If installing near a GFCI outlet, test it afterward to ensure it’s functioning properly, as it’s an added safety measure.
- Seek Professional Help: If you’re unsure about the installation process or your home’s electrical setup, consult a licensed electrician.
- Keep a Fire Extinguisher Handy: Although rare, electrical work can create sparks. Have a fire extinguisher nearby as a precaution.
- Educate Yourself on Electrical Standards: Understand your local electrical codes to ensure your installation is compliant.
By following these safety tips and best practices, you reduce the risk of injury and ensure a secure and effective installation of your smart light switch dimmer.

Troubleshooting Common Installation Issues
When it comes to installing your smart light switch dimmer, you might encounter some issues. These problems can range from wiring difficulties to connectivity troubles. Here’s how to troubleshoot the most common installation challenges:
- Dimmer Does Not Turn On: If your smart dimmer doesn’t power up, recheck the circuit breaker and ensure it is in the ‘ON’ position. Verify that all wires connect properly as per the installation manual.
- Flickering Lights: Sometimes, lights may flicker when using dimmers. Make sure your bulbs are dimmable and compatible with the smart dimmer. Tighten any loose connections.
- Wi-Fi Connectivity Issues: If your smart dimmer isn’t connecting to Wi-Fi, try moving your router closer or eliminating signal obstacles. Restart both the dimmer and your router to refresh the connection.
- Dimmer Is Unresponsive: In case the dimmer doesn’t respond to app or voice commands, check if the device pairs correctly with your home automation system. Update or reinstall the app if necessary.
- Overheating: If the smart dimmer feels hot to the touch, it may be due to excessive load. Lower the connected wattage by replacing bulbs with lower-wattage or LED equivalents.
- No Response from Dimming Feature: When the dimming function doesn’t work, ensure your wiring includes a neutral wire if required by the dimmer. It’s also essential to check that your bulbs support dimming.
- Resetting the Dimmer: After power outages or unexpected issues, you might need to reset the smart dimmer. Follow the manufacturer’s instructions for resetting the device.
- Electrical Noise or Hum: This can occur with some dimmer and bulb combinations. Opt for a different brand or type of bulb, or consider installing a noise filter.
If these steps don’t resolve your issue, consult the troubleshooting section in your smart dimmer’s manual or reach out to the customer support team for assistance.

Warranty and Support for Smart Dimmers
When incorporating a smart light switch dimmer into your smart home setup, understanding the warranty and support options is crucial. Here we detail what you should know about the policies surrounding your smart dimmer to ensure you’re covered in the event of issues.
Warranty Policy
Purchasing a smart light switch dimmer typically includes a manufacturer’s warranty. This warranty generally covers any defects in materials or workmanship. Here’s what to keep in mind:
- Check the Warranty Period: Most smart dimmers come with a one-year warranty, but this can vary.
- Save Your Proof of Purchase: Always keep your receipt or invoice, as you’ll need it to claim the warranty.
- Understand What’s Covered: Read the warranty terms to know what issues qualify for repair or replacement.
- Do Not Attempt Repairs: Trying to fix the dimmer yourself could void the warranty. Contact support for assistance.
Support Options
In case you encounter problems with your smart dimmer, manufacturers offer various support options:
- Customer Service: Reach out through email, phone, or live chat for help with installation or troubleshooting.
- Online Resources: Make use of manuals, FAQs, and video tutorials available on the manufacturer’s website.
- Community Forums: Engage with other users in forums for tips and solutions to common problems.
If you experience a fault after installation, contact the manufacturer without delay. Attempting to fix the product on your own can invalidate the warranty, so it’s best to seek professional help. Remember, the support team is there to assist you, ensuring your smart light switch dimmer operates as intended for the best smart home experience.
How to Cancel or Modify Your Order
Sometimes, plans change, and you may need to cancel or modify your order for a smart light switch dimmer. Here is a simple guide to help you with the process:
- Contact Customer Service: Act quickly and reach out to the retailer’s customer service team via email or phone.
- Provide Order Details: Have your order number and details ready to expedite the process.
- Request Cancellation or Changes: Clearly state whether you’d like to cancel or modify your order. Be specific about any changes.
- Confirmation of Changes: Wait for a confirmation email or call from the customer service confirming your request has been processed.
- Check for Cancellation Fees: Some companies may charge a fee for cancellations or modifications; inquire about this beforehand.
- Review the Deadline: Understand the time frame you have to make any changes to avoid being too late.
If you need to cancel or modify your order after it’s been processed or shipped, it may be subject to different terms. Check the company’s cancellation policy to know your options and any potential costs involved. Remember, swift and clear communication with customer service is key to a hassle-free modification or cancellation.
Understanding the Refund Policies
When purchasing a smart light switch dimmer, being aware of the refund policies is important. Here’s what you need to know about getting refunds:
- Initiate the Refund: Contact the seller as soon as you decide to return the smart dimmer. Do this through email or phone.
- Proof of Purchase: Keep your receipt or order confirmation. You will need it to process the refund.
- Return Condition: Make sure the smart dimmer is in its original packaging and condition.
- Shipping Back: You may need to ship the item back to the seller. Check who covers the shipping costs.
- Refund Method: The refund is usually returned using the original payment method.
- Refund Timing: After the seller receives the returned item, refunds can take a few days to process.
- Restocking Fee: Some sellers might charge a restocking fee. Ask about this fee before you buy.
If the refund process seems complex, reach out to customer service for help. They can guide you through each step. This ensures your refund is processed smoothly and without errors.