Introduction
If you’re a Nintendo Switch Lite owner, you know how essential the joystick functionality is for a smooth gaming experience. Unfortunately, just like any device, the joysticks on your Switch Lite can wear out or become unresponsive over time. This is where switch lite joystick replacement comes into play. In this article, we will explore top tips and tricks for successfully replacing the joystick on your Nintendo Switch Lite. Whether you’re familiar with repairs or seeking to learn more, this guide will equip you with the knowledge needed to complete the process effectively.
Understanding Joystick Functionality
Before diving into replacement techniques, it’s crucial to understand how the joystick functions and why it might fail.
1. How Joysticks Work
The joystick on the Nintendo Switch Lite relies on potentiometers to read directional inputs. When you move the joystick, it sends signals to the console indicating the direction of movement. Over time, wear and tear can lead to issues such as drifting, where the joystick registers movement even when not in use.
2. Common Causes of Joystick Failure
Several factors contribute to joystick failure, including:
- Dirt and Debris: Accumulation of dirt or particles can interfere with joystick movement.
- Wear and Tear: Regular use can wear down internal components, leading to failures.
- Moisture Damage: Exposure to moisture can affect the joystick’s functionality, leading to corrosion or short-circuiting.
3. Signs You Need a Replacement
Being aware of the signs of a failing joystick helps you address issues early. Common symptoms include:
- Inconsistent or erratic movement during gameplay.
- The joystick feels sticky or unresponsive.
- Drifting in one direction without physical input.
Recognizing these issues early can save you time and ensure a smoother gaming experience.
Preparing for the Replacement
Before replacing the joystick, it’s essential to gather the necessary tools and materials to ensure a successful process.
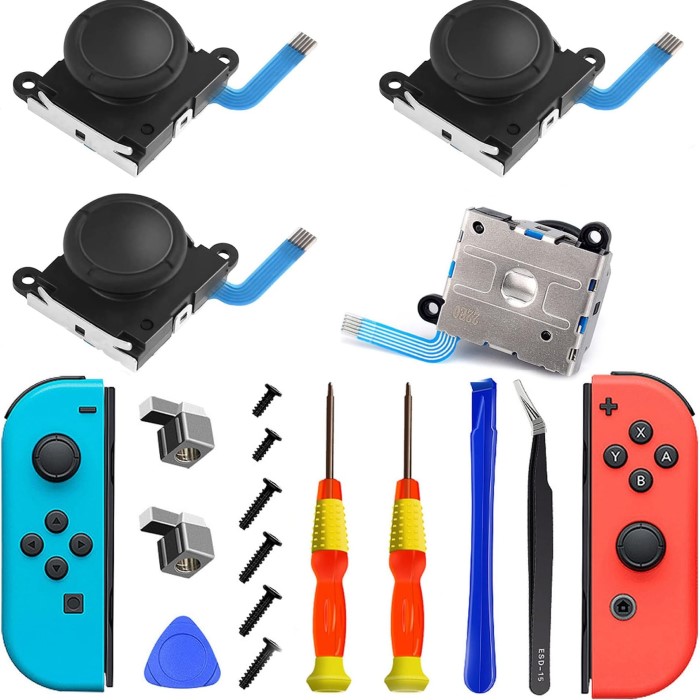
1. Required Tools
Gather the following tools for the replacement:
Small Phillips Head Screwdriver
- Purpose: The small Phillips head screwdriver is essential for accessing internal components in devices like the Nintendo Switch Lite. It is specifically designed to fit into the screws that secure various parts of the device.
- Selecting the Right Size: It’s important to choose a screwdriver with the appropriate size that matches the screws in your device. Using the correct size prevents stripping the screws, which can lead to further complications during repairs.
- Quality Matters: Invest in a high-quality screwdriver as it enhances grip and provides better torque. A sturdy tool can make the disassembly process smoother and reduce the risk of damaging screws.
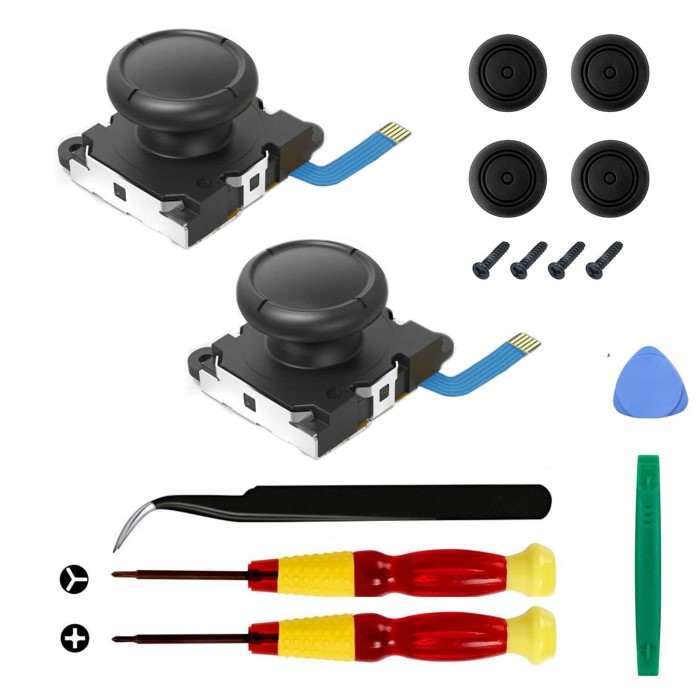
Plastic Opening Tools
- Functionality: Plastic opening tools are invaluable when it comes to separating the casing of your device. They help you pry open the casing carefully without scratching or damaging the surface.
- Types of Tools: These tools come in various shapes and sizes, allowing for flexibility in accessing different areas of the device. A thin, flat tool is often ideal for getting into tight spaces.
- Avoiding Damage: Using plastic tools minimizes the risk of damaging the casing and ensures that the internal components are not stressed during the opening process. Metal tools can nick and scratch surfaces, so plastic is a safer choice.
Tweezers
- Handling Small Parts: Tweezers are useful for handling small parts during the replacement process. They provide precision when extracting or inserting tiny components, making the process easier and more accurate.
- Types of Tweezers: Look for fine-tipped tweezers that allow you to grasp small screws, connectors, or other delicate parts without damaging them. Anti-static tweezers are also a good option as they prevent static electricity from harming electronic components.
- Increased Control: Using tweezers improves your dexterity, enabling you to maneuver within tight spaces. This control is especially helpful when dealing with fragile components, ensuring that they are replaced or fixed without unnecessary stress or damage.
Suction Cup
- Purpose: A suction cup is typically used for prying screens or casings away from the body of the device. It creates a strong grip on smooth surfaces, allowing for easier disassembly.
- How to Use: To use a suction cup effectively, place it on the screen or casing and pull. This action creates a gap that can be utilized in conjunction with plastic opening tools to separate the components.
- Optional Tool: While a suction cup is not strictly necessary for every disassembly, it can significantly ease the process, particularly for devices with tightly fitted screens or casings. If you find difficulty in separating parts, employing a suction cup might be beneficial.
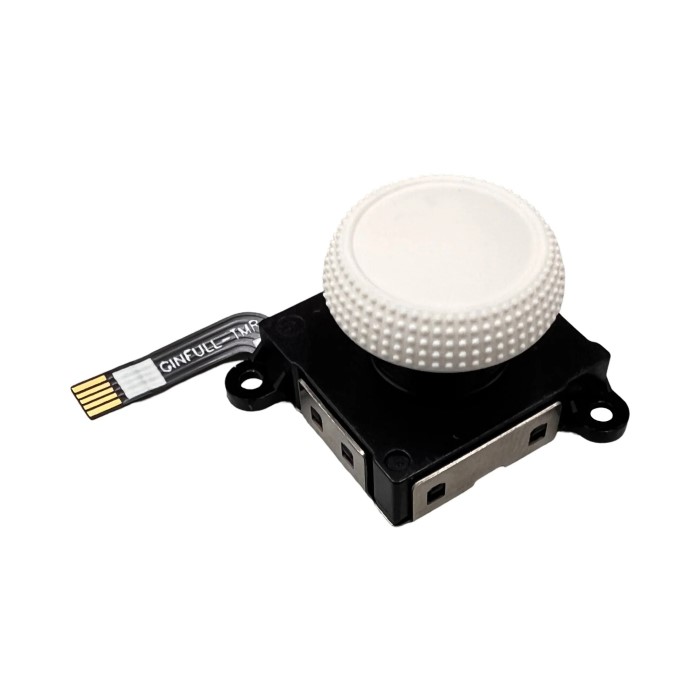
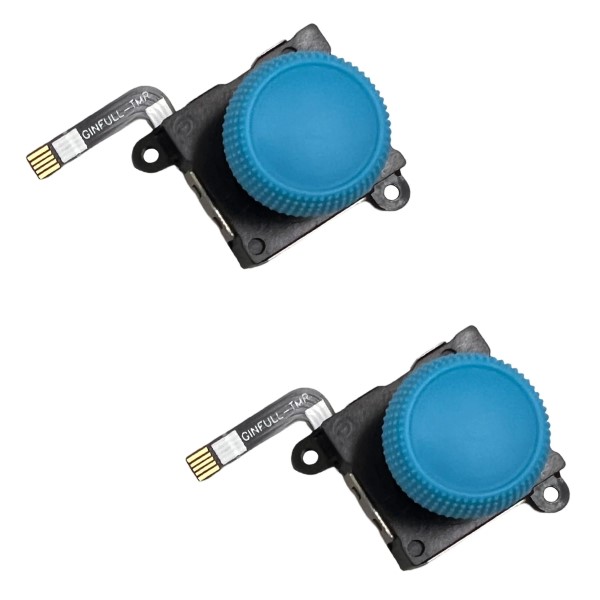
2. Replacement Joystick
Purchase a quality replacement joystick designed specifically for the Nintendo Switch Lite. Ensure that the product has good reviews and is compatible with your device model. Many online retailers offer this part, making it accessible for your repair.
3. Assemble Your Workspace
Set up a clean, well-lit workspace to avoid losing small pieces during the process. Use an anti-static mat if possible to protect electronic components from static electricity.
4. Backup Your Data
It’s always a good idea to back up your game data before beginning any internal repair. Use cloud storage or a microSD card to ensure that your saved games are safe.
By preparing adequately and having the necessary tools at hand, you can streamline the replacement process.
Step-by-Step Guide to Replacing the Joystick on a Switch Lite
Now that you’re prepared, let’s walk through the replacement process step by step.
1. Turn Off Your Switch Lite
Always ensure your Nintendo Switch Lite is turned off before beginning any repairs. Disconnect any cables and remove any accessories connected to the device.
2. Open the Console
- Use the Phillips screwdriver to remove the screws securing the back panel of your Switch Lite. Keep track of these screws for reassembly.
- Carefully separate the back panel from the front casing using plastic opening tools. Be gentle to avoid damage.
3. Disconnect the Battery
Locate the battery connector and gently disconnect it. This step is crucial to avoid accidental short circuits while working on the internal components.
4. Remove the Motherboard
- Carefully unscrew the motherboard, making sure to keep track of all screws and components.
- Gently lift the motherboard out, taking care not to damage any cables connected to it.
5. Replace the Joystick
- Locate the joystick that you need to replace.
- Carefully detach the old joystick by unscrewing it and disconnecting any cable attached to it.
- Install the new joystick by connecting it and securing it with screws.
6. Reassemble the Console
Reverse the steps taken to reassemble your Switch Lite:
- Carefully place the motherboard back into the casing and reconnect the battery.
- Secure the back panel with screws and ensure everything is tight but not overly rigid.
7. Power On and Test
After reassembly, power on your device to test the new joystick. Confirm that it responds accurately and has no drifting issues.
Taking your time during the replacement ensures nothing is damaged and that the new joystick functions correctly.
Tips and Tricks for a Successful Replacement
Achieving a successful switch lite joystick replacement requires attention to detail. Here are some tips to enhance your process:
1. Follow Video Tutorials
YouTube and other platforms host numerous tutorials demonstrating the replacement process. Following these guides can help clarify steps and provide visual assistance.
2. Use Proper Lighting
Good lighting is crucial while working on small devices. Adequate illumination reduces the risk of losing tiny screws and assists in clearly seeing connectors.
3. Be Organized
Keep screws and small parts organized by placing them in labeled containers. This practice simplifies reassembly and avoids confusion later.
4. Take Your Time
Don’t rush the process. Allow yourself plenty of time to carefully address each step, preventing unnecessary mistakes.
5. Test Before Sealing
Once you replace the joystick, test it while the device is still open to ensure it works. This practice can save you time if additional adjustments are needed.
Implementing these tips will not only improve your skills but also make the replacement process smoother and more efficient.
FAQs About Switch Lite Joystick Replacement
Here are some common questions related to switching out the joysticks on your Nintendo Switch Lite.
Can a Switch Lite joystick be replaced?
Yes, the joystick on a Nintendo Switch Lite can be replaced. Many users successfully replace theirs to fix issues like drifting or unresponsiveness, improving gameplay.
How much does it cost to get a Switch Lite joystick fixed?
The cost of fixing a Switch Lite joystick can vary depending on whether you do it yourself or seek professional help. DIY replacement parts usually range from 10to40, while professional repairs may cost significantly more due to labor charges.
Can I use a different controller for Switch Lite?
While the Switch Lite is primarily designed for handheld use, you can connect external controllers via Bluetooth. However, the experience may differ, and features like motion control may not work as intended.
Does the Switch Lite use the same joysticks?
Typically, the Switch Lite uses joysticks compatible with the original Nintendo Switch controllers. It’s essential to ensure that the replacement part you purchase specifically fits the Switch Lite model.
Conclusion
The switch lite joystick replacement process is highly manageable with the right tools and knowledge. This article provided essential tips, step-by-step instructions, and troubleshooting advice to help you successfully replace your joystick. By following these guidelines, you can restore your Nintendo Switch Lite’s functionality and enjoy seamless gaming again. Whether undertaking the replacement yourself or considering professional help, understanding the process equips you with the confidence needed to enhance your gaming experience. Happy gaming!