In the digital age, a mechanical keyboard has become an essential tool for gamers, programmers, writers, and anyone who spends significant time typing. However, with frequent use comes the inevitable accumulation of dirt, dust, and debris, which can affect both the performance and longevity of your keyboard. Understanding how to clean mechanical keyboard effectively is crucial to maintaining its optimal functionality and ensuring a pleasant typing experience. In this comprehensive guide, we will explore various methods and best practices for cleaning your mechanical keyboard, ensuring it remains in pristine condition for years to come.
 Why Clean Your Mechanical Keyboard?
Keeping a mechanical keyboard clean is crucial for several reasons. First, dust, dirt, and grime can accumulate between the keys over time. This can lead to unresponsive buttons or cause the keyboard to malfunction. Regular cleaning will ensure that each keystroke is crisp and that your typing experience remains comfortable.
Moreover, a clean keyboard is essential for hygiene. Our hands come into contact with many surfaces throughout the day and can transfer bacteria and viruses to our keyboard. Regular cleaning can help minimize the risk of spreading germs.
Lastly, a well-maintained mechanical keyboard can extend its lifespan. Dirt can cause wear and tear on the switches and the circuitry, leading to costly repairs or the need for a replacement. By understanding how to clean a mechanical keyboard and incorporating it into your routine, you can protect your investment and enjoy a pristine typing surface for years to come.
 Preparing to Clean Your Keyboard
Before diving into how to clean a mechanical keyboard, you’ll need to prep your workstation. Proper preparation ensures that the cleaning process is smooth, safe, and effective.
Gather Necessary Cleaning Supplies
Begin by assembling all the tools and materials you’ll need:
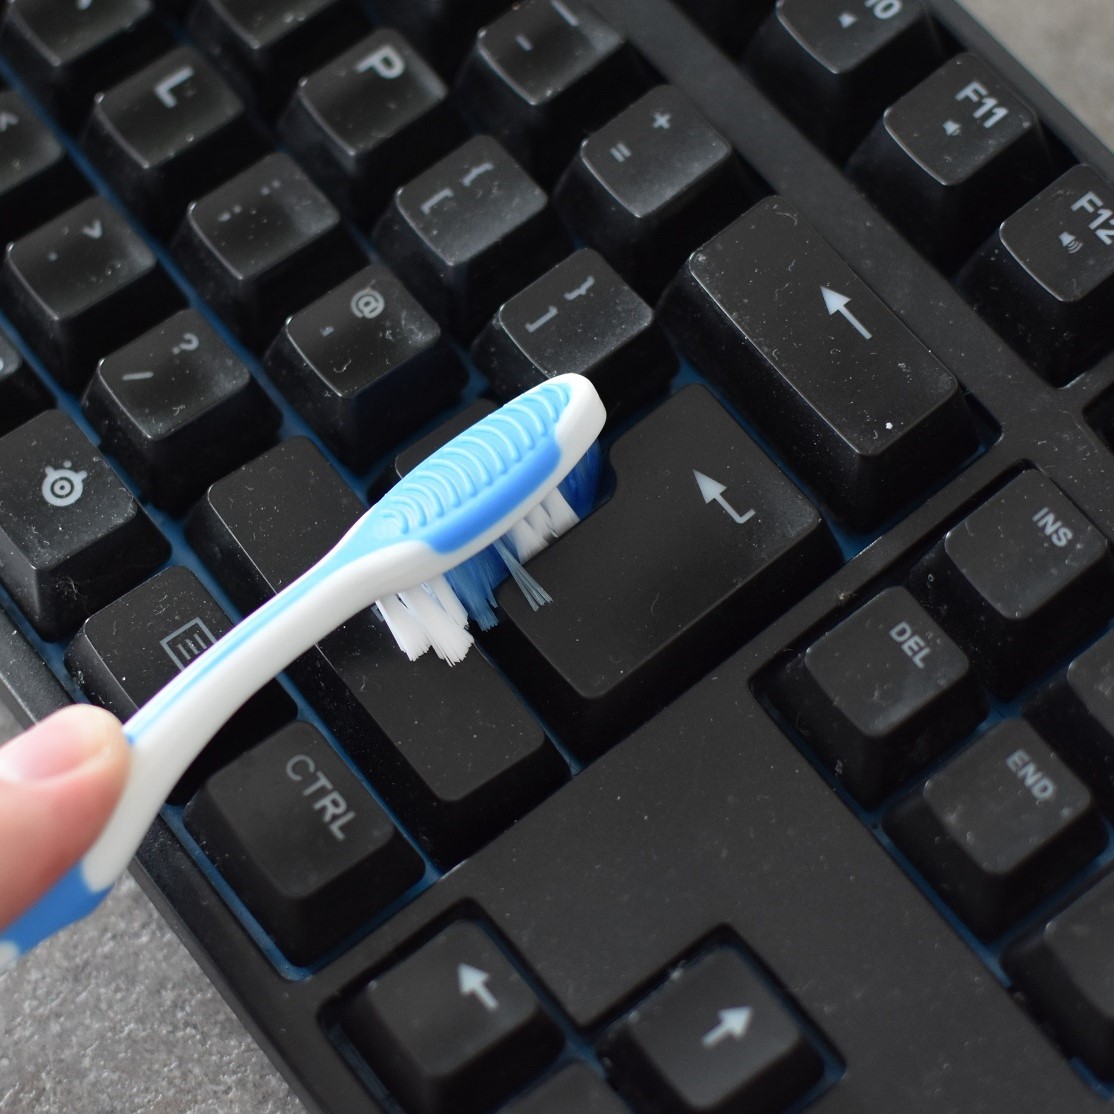
- Soft-bristled brush: To sweep away dust and debris between keys.
- Keycap puller: This tool helps remove keycaps safely without causing damage.
- Isopropyl alcohol: Ideal for disinfecting and cleaning without leaving residue.
- Microfiber cloths: Soft and non-abrasive, perfect for wiping surfaces.
- Cotton swabs: For detailed cleaning around key switches and tight spaces.
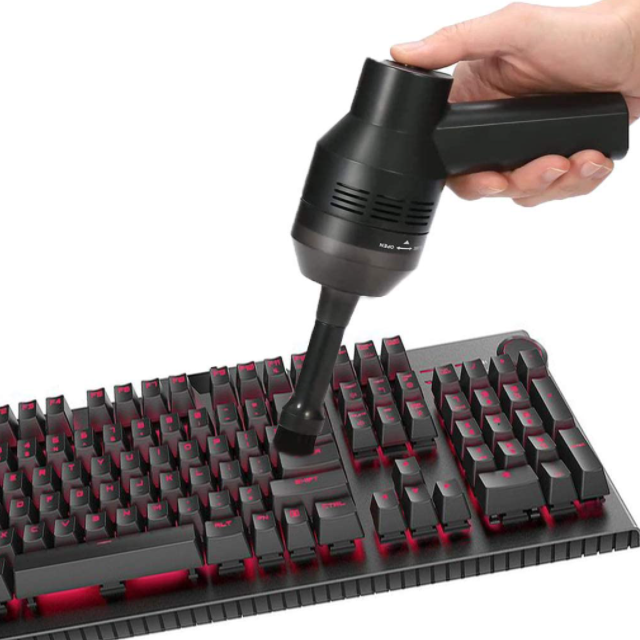
- Compressed air: Canister or electric, for blowing out dust from under the keycaps.
Assemble these items on a clean, flat surface to create an organized workspace. Check that you have all supplies at hand before proceeding to the next step.
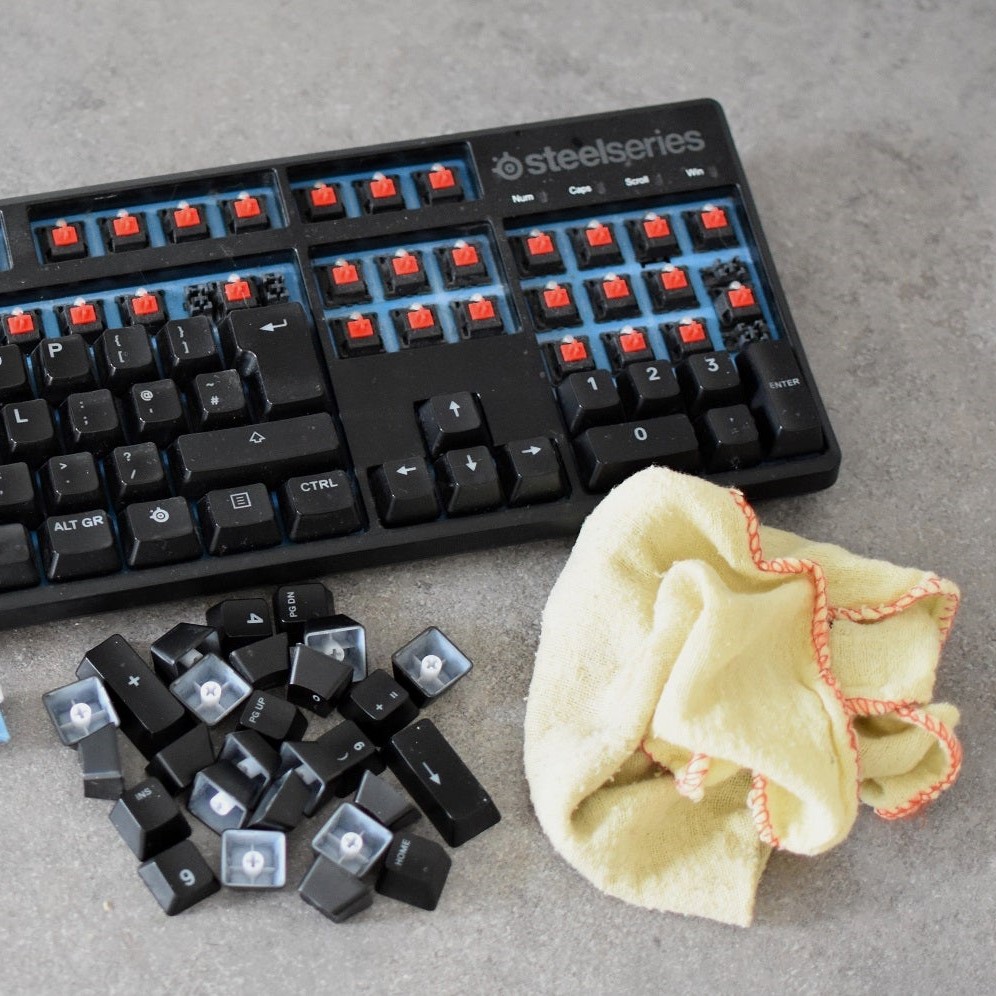
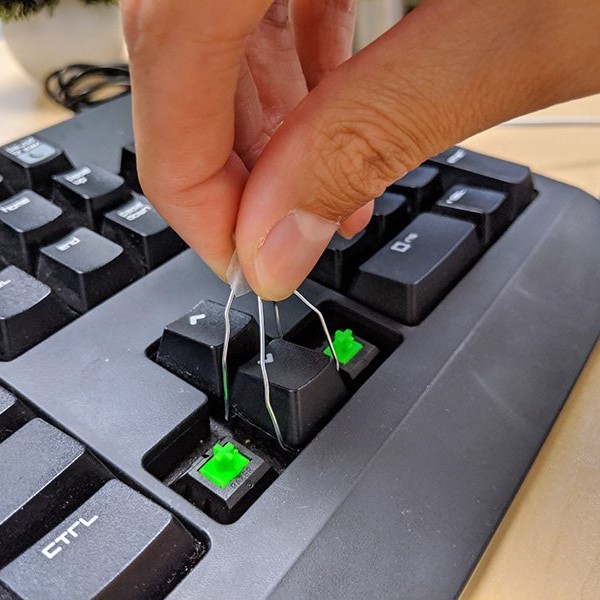
Unplug and Remove Keycaps
Safety first! Always unplug your mechanical keyboard from its power source to prevent any electrical hazards. Once it’s safely disconnected, you can begin the disassembly:
- Use the keycap puller to gently remove each keycap. Make sure to apply even pressure and wiggle the tool slightly to ease the keycaps off.
- Place the removed keycaps in a container or layout them in the order they go on the keyboard to make reassembly easier later on.
- After all keycaps are removed, take a moment to inspect the exposed key switches and plan your cleaning strategy.
By following these initial steps, you’re now ready to move on to the cleaning methods that will bring your mechanical keyboard back to its former glory.
Everyday Cleaning Techniques
To maintain the performance and longevity of your mechanical keyboard, incorporating everyday cleaning techniques is essential. These simple, yet effective methods will help to keep your keyboard in top condition with minimal effort.
Dusting and Light Cleaning
Dusting is the first line of defense against the buildup of debris. Here’s a quick guide:
- Daily Dusting: Use a soft-bristled brush or compressed air to gently remove dust from the surface and between keys.
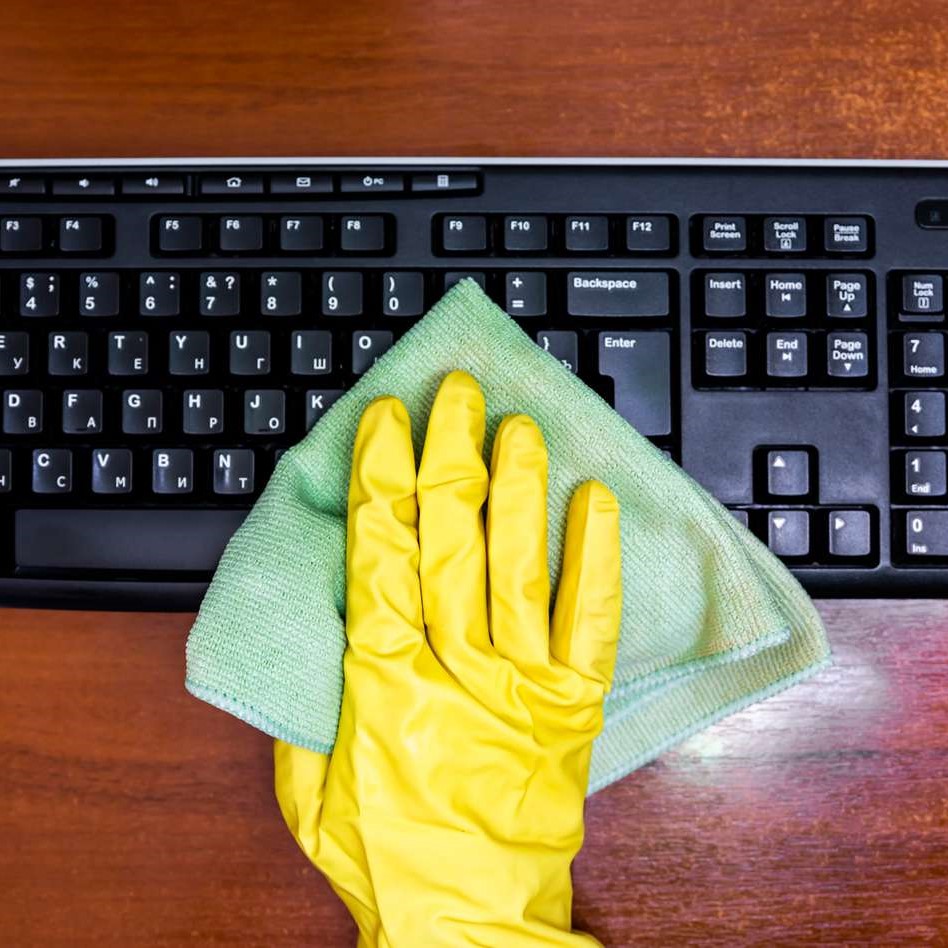
- Wiping: With a slightly damp microfiber cloth, wipe the surface of the keyboard gently. Do not allow moisture to seep into the key switches.
- Consistency: Make dusting and wiping part of your daily routine to prevent the accumulation of dirt.
Light cleaning doesn’t take much time but goes a long way in maintaining keyboard hygiene and functionality.
Cleaning Spills and Sticky Keys
Accidents happen, and spills are inevitable. Act fast with these steps:
- Immediate Action: Quickly disconnect your keyboard and blot the spill with a dry cloth. Avoid spreading the liquid.
- Sticky Key Treatment: If keys are sticky, remove the affected keycaps and clean them separately using isopropyl alcohol and cotton swabs.
- Dry Thoroughly: Before reassembling, ensure all components are completely dry.
Prompt attention to spills can prevent long-term damage and restore key responsiveness. Remember, the key to effective mechanical keyboard maintenance is regularity and prompt action when dealing with spills or stickiness.
 Deep Cleaning Your Mechanical Keyboard
Aside from everyday cleaning, a thorough deep clean is vital for your mechanical keyboard’s upkeep. Deep cleaning tackles stubborn dirt and dust that daily routines may miss. Plan deep cleaning sessions every few months or when keys feel gritty.
Cleaning the Key Switches
Cleaning the key switches requires care. Follow these steps:
- Switch Inspection: Look closely for debris stuck around the switches.
- Compressed Air: Use short bursts to dislodge debris from around the switch mechanisms.
- Gentle Swabbing: Dip a cotton swab in isopropyl alcohol. Carefully clean around each switch.
- Let Dry: Ensure switches dry completely before moving on to prevent damage.
Cleaning key switches improves keystroke response and prevents malfunctions.
Dealing with PCB and Case
When cleaning the PCB (Printed Circuit Board) and case, be gentle. Electronics are sensitive. Here’s what to do:
- Soft Brushing: With a soft-bristled brush, dust off the PCB.
- Light Wiping: If needed, use a microfiber cloth dampened with isopropyl alcohol to lightly wipe the PCB.
- Case Cleaning: Use the same cloth to clean the case inside and out.
- Inspect and Dry: Double-check no liquid remains and let everything dry.
A clean PCB and case help maintain the keyboard’s functionality and aesthetics. Remember to apply the ‘how to clean mechanical keyboard’ techniques carefully to prevent any damage.
Maintenance Tips to Keep Your Keyboard Clean Longer
To keep your mechanical keyboard clean, you need to follow a few key maintenance tips. Here are some practices that will help your keyboard stay spotless for a longer period:
- Regular Dusting: Make it a habit to dust your keyboard at least once a week.
- Hand Hygiene: Wash your hands before using your keyboard to minimize grease and dirt transfer.
- Avoid Eating Over Your Keyboard: Crumbs and spills are a keyboard’s enemies. Eat away from your workspace.
- Protective Cover: When not in use, cover your keyboard to prevent dust accumulation.
- No Smoking: Smoking near your keyboard can lead to ash and residue buildup. It’s best to keep your work area smoke-free.
- Stable Humidity: Keep your room at a stable humidity level to prevent moisture from settling in the keyboard.
- Storage: Store your keyboard in a clean, dry place if you’re not going to use it for an extended period.
By implementing these tips on how to clean your mechanical keyboard, you’ll not only enhance its lifespan but also enjoy a cleaner, more hygienic typing experience. Regular upkeep is the best way to ensure that your mechanical keyboard remains in tip-top condition for as long as possible.
 Reassembling Your Mechanical Keyboard After Cleaning
Once your mechanical keyboard is clean, it’s time to put everything back together. Here’s a step-by-step guide to reassembling your keyboard:
- Check for Dryness: Confirm all parts are completely dry. Moisture can damage electronics.
- Place Keycaps Back: Start from one corner and move to the opposite. Press firmly to secure each keycap.
- Test Stability: Gently tug on the keycaps to ensure they’re snug and won’t come loose during use.
- Reconnect Keyboard: Plug your keyboard back into the power source.
- Functionality Test: Type on each key to ensure they all register properly.
- Adjust if Necessary: If a key doesn’t respond, check for proper placement or debris.
Reassembling your mechanical keyboard carefully will help maintain its performance after cleaning. Patience is key to successful reassembly. Carefully integrating these steps on how to clean a mechanical keyboard, you can resume typing with confidence.
Troubleshooting Common Issues Post-Cleaning
After you clean your mechanical keyboard, you might face some issues. Here’s how to fix them:
- Keys Not Responding: Double-check each keycap is properly seated. If one doesn’t work, reseat it.
- Sticky Keys Still: Residual stickiness can linger. Remove keycap again and clean the switch with alcohol.
- Unusual Typing Sounds: This could be due to improperly seated keycaps or debris. Reinspect and clean if necessary.
- Keyboard Not Working: Ensure it’s plugged in correctly. If it still doesn’t work, try a different port.
These tips should help you solve the most common issues when learning how to clean a mechanical keyboard. Remember to handle your keyboard with care, and it will serve you well for a long time.
Advanced Cleaning Techniques for Mechanical Keyboards
For those who want to take their keyboard cleaning to the next level, consider these advanced techniques to ensure a thorough and professional-grade cleanup:
Removing and Cleaning Individual Switches
Some mechanical keyboards allow you to remove individual switches. This enables a more detailed cleaning process, allowing you to access parts that are otherwise difficult to reach. Carefully investigate if your keyboard model supports switch removal and follow the manufacturer’s guidelines.
Using Steam Cleaners
Steam cleaners can effectively remove stubborn grime and sanitize your keyboard without the need for harsh chemicals. However, use this method with caution to avoid moisture damage. Ensure your keyboard is compatible with steam cleaning and follow all safety precautions.
Applying UV Light for Sanitization
After cleaning, using a UV light sanitizer can help eliminate bacteria and viruses, ensuring your keyboard is hygienic. This step is especially beneficial in environments where multiple people use the same keyboard.
Engraving Personalization
Enhance your mechanical keyboard by engraving personalized designs or keycap labels. This adds a unique touch to your keyboard, making it not only functional but also a reflection of your personality and style.
 Benefits of Regularly Cleaning Your Mechanical Keyboard
Maintaining a clean mechanical keyboard offers numerous benefits that enhance both your typing experience and the keyboard’s longevity:
Improved Typing Accuracy
A clean keyboard ensures that each keypress registers accurately, reducing typing errors and enhancing overall productivity. Ensuring the switches are free from dirt and debris guarantees a responsive and reliable typing experience.
Enhanced Aesthetic Appeal
Regular cleaning keeps your keyboard looking new and well-maintained. A spotless keyboard not only looks better but also reflects positively on your personal or professional image.
Extended Keyboard Lifespan
Proper maintenance prevents premature wear and tear, extending the lifespan of your mechanical keyboard. Regular cleanings reduce the risk of damage to switches and keycaps, ensuring your investment lasts longer.
Healthier Workspace
A clean keyboard contributes to a healthier workspace by minimizing the accumulation of germs and allergens. This is particularly important in shared environments, where maintaining hygiene is crucial for everyone’s well-being.
Cost Savings
By preventing damage and wear, regular cleaning reduces the need for costly repairs or replacements. A well-maintained keyboard continues to perform optimally, saving you money in the long run.
Enhanced User Satisfaction
Ultimately, a clean mechanical keyboard provides a more satisfying and enjoyable typing experience. Investing time in regular maintenance ensures that your keyboard remains a reliable and pleasure to use tool.
Conclusion
Understanding how to clean mechanical keyboard is essential for maintaining the performance, longevity, and aesthetic appeal of your keyboard. By following the steps outlined in this guide—ranging from basic cleaning techniques to advanced maintenance—you can ensure your mechanical keyboard remains in excellent condition, providing a seamless and enjoyable typing experience.
Regular cleaning not only enhances the functionality of your keyboard but also promotes a healthier and more productive workspace. Avoid common mistakes, utilize the right tools and materials, and incorporate advanced cleaning techniques as needed to achieve professional-grade results. Whether you’re a casual user or a dedicated enthusiast, mastering the art of cleaning your mechanical keyboard will help you get the most out of your investment, ensuring it serves you well for years to come.
Embrace these maintenance practices and transform your mechanical keyboard into a pristine, high-performing instrument that not only meets your needs but also elevates your overall computing experience. A clean keyboard is a happy keyboard, and with the right care, yours can remain a reliable and stylish accessory in your daily life.