Introduction to Mechanical Keyboard Maintenance
Maintaining your mechanical keyboard is crucial for ensuring its performance and longevity. With frequent use, keyboards gather dust, debris, and oils from our fingers. This can lead to sticky keys, unresponsive switches, and a less satisfying typing experience. Regular maintenance can help prevent these issues, keeping your keyboard in top condition.
Firstly, it’s important to understand what mechanical keyboards are. They have individual switches under each keycap, unlike membrane keyboards. This design offers a tactile and often clicky feedback that’s prized by typists and gamers alike. However, the intricate mechanisms also mean they can trap more dirt. That’s why knowing how to clean a mechanical keyboard is valuable.
In this guide, we’ll provide a detailed walkthrough explaining each maintenance step. From the tools and materials you’ll need, to the process of removing keycaps and addressing spills, we’ve got you covered. We also explain how to lubricate the switches – a step often overlooked but essential for smooth key action.
By following this guide, you will not only enhance your keyboard’s functionality but also extend its life. Enjoy a cleaner, more responsive, and visually appealing keyboard by embracing a maintenance routine that fits your usage patterns. Let’s begin by preparing for cleaning with the right tools and materials.
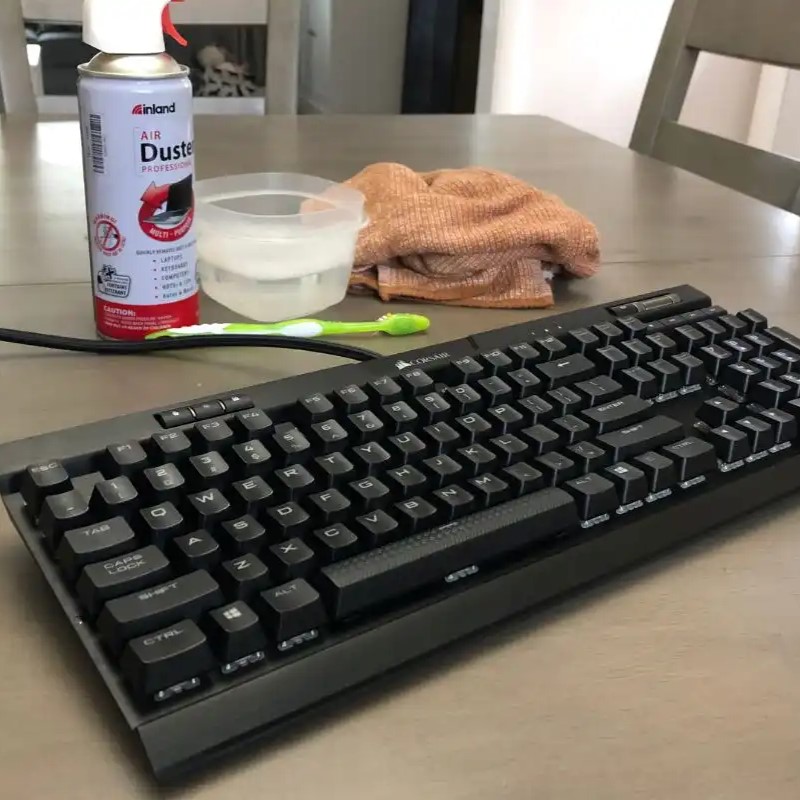
 Preparing for Cleaning: Tools and Materials Needed
Before diving into how to clean a mechanical keyboard, it’s important to gather the proper tools and materials. Good preparation will make the cleaning process smoother and more effective. Here’s what you’ll need to get started:
- Keycap Puller: This tool helps remove keycaps safely without damaging them or the switches underneath.
- Soft Brush or Compressed Air: Use these to dislodge and remove dust from the keyboard deck.
- Isopropyl Alcohol: This disinfectant is ideal for cleaning without leaving residue.
- Microfiber Cloths: Soft and non-abrasive, microfiber cloths are perfect for wiping surfaces gently.
- Cotton Swabs: These can reach tight spaces between keys and help apply lubricant or remove grime.
- Lubricant: A specialized keyboard lubricant is essential for keeping switches smooth.
- Small Bowl: Have one on hand to keep the removed keycaps in place during cleaning.
Organize your workspace and keep these tools within reach. This way, you won’t have to stop mid-clean to look for something you missed. After you’ve assembled these items, you’re set to begin cleaning your mechanical keyboard step by step.
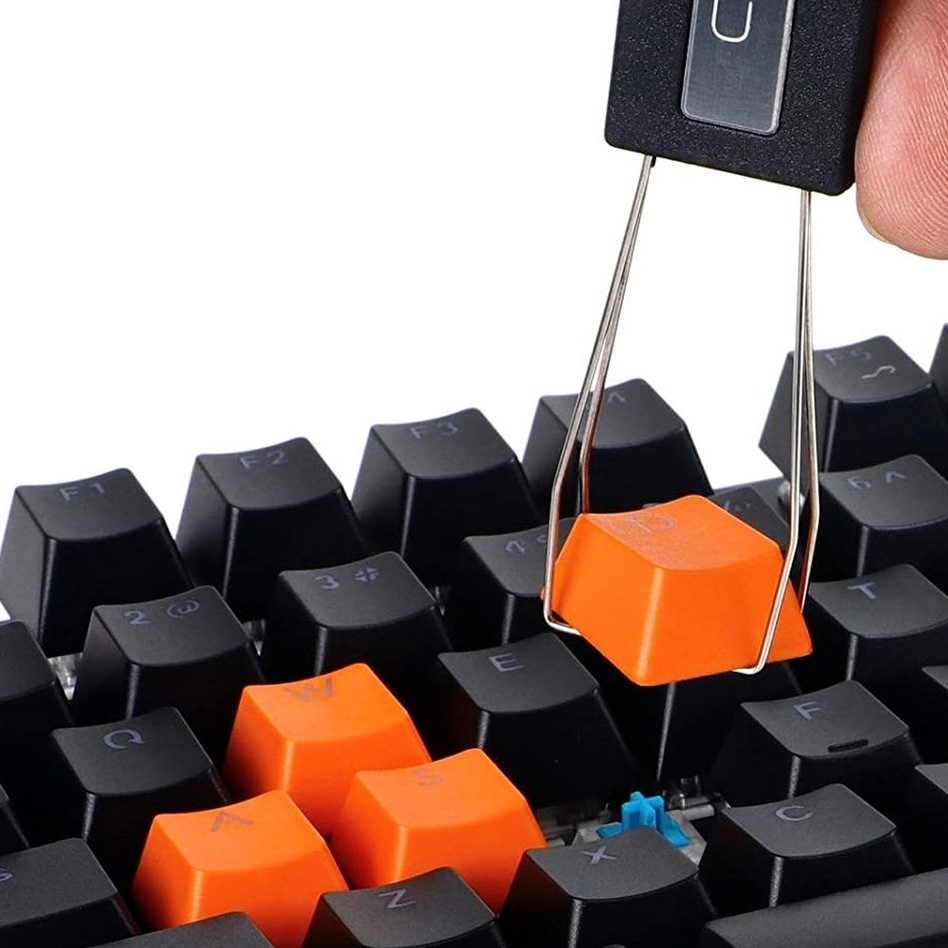
Step 1: Unplugging and Removing Keycaps
The first step in cleaning your mechanical keyboard is to safely unplug it. This prevents any electrical issues and ensures your safety. With the keyboard powered off, you can start removing the keycaps. You’ll use the keycap puller for this task. Position the keycap puller’s arms under the keycap you wish to remove. Gently but firmly pull upwards. The keycap will pop off, revealing the switch underneath.
Work your way across the keyboard, pulling keycaps one at a time. Be extra careful with larger keys like Spacebar, Enter, and Shift. These might have stabilizers that need gentle handling. As you remove them, place the keycaps into the small bowl. This keeps them from getting lost and makes the next steps easier.
Remember, the goal is to clean without causing damage. Do not use excessive force when removing the keycaps. Applying too much pressure can harm the switches or the keycaps themselves. Proceed with patience and attentiveness. After all the keycaps are removed, you are ready to move on to the next phase of cleaning.
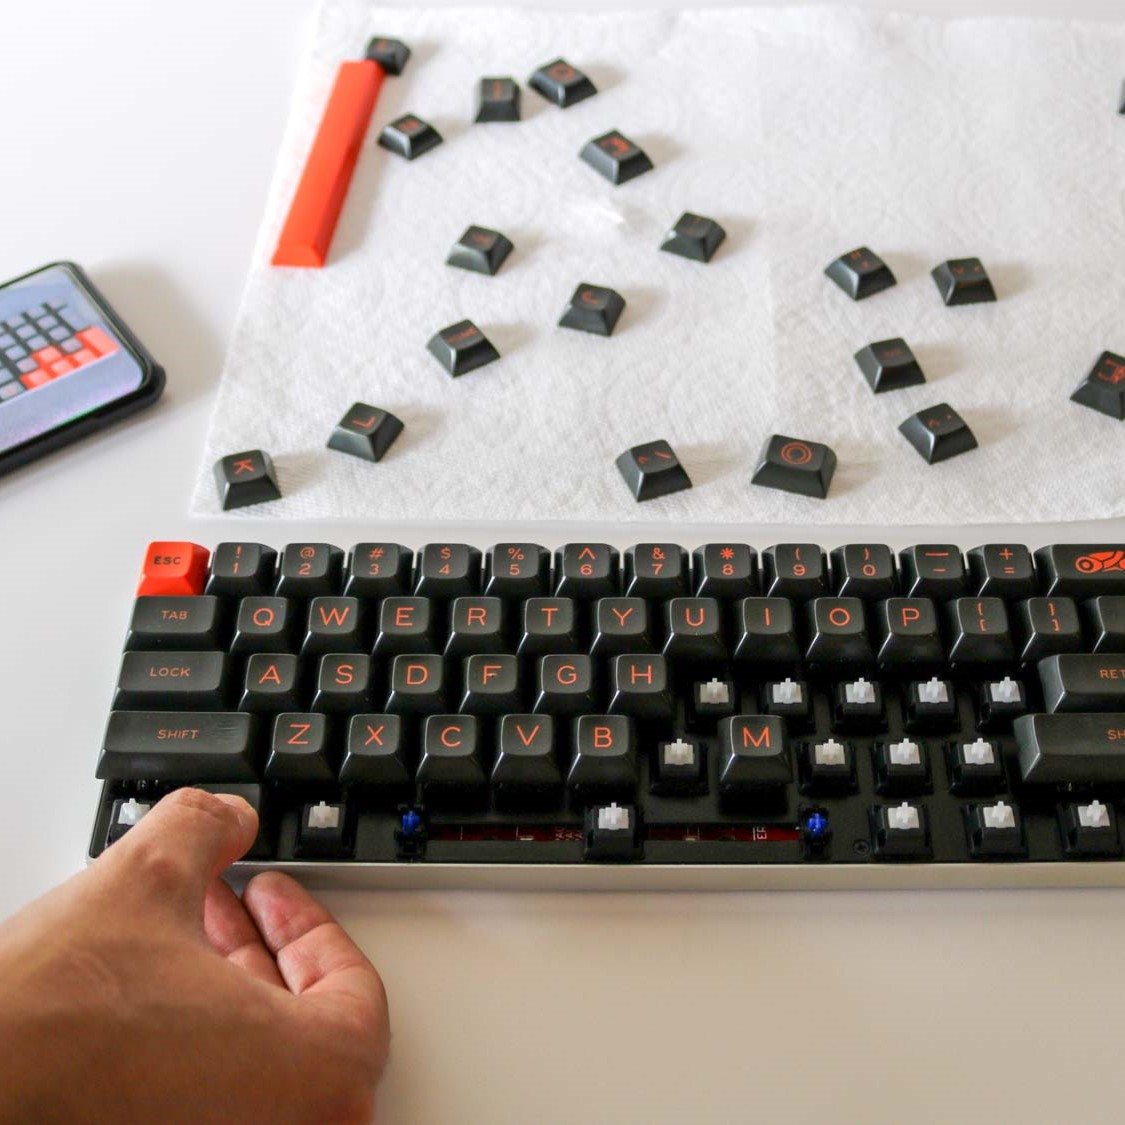
Step 2: Cleaning the Keycaps
Once you have removed all the keycaps, it’s time to focus on cleaning them. Since keycaps are the part of the keyboard we touch the most, they can accumulate oils, grime, and bacteria. Here’s how to clean a mechanical keyboard’s keycaps effectively:
- Soak in Soapy Water: Fill a container with warm water and mild dish soap. Place the keycaps in the container and let them soak for a few hours to loosen any grime.
- Scrub Gently: After soaking, take a soft brush or cloth and gently scrub each keycap. Pay special attention to the sides where oils often accumulate.
- Rinse Thoroughly: Once scrubbed, rinse the keycaps under cold water to remove any soap residues.
- Dry Completely: Keycaps must be entirely dry before reattaching. Lay them out on a towel and wait until they are dry to the touch.
Be sure not to use any abrasive materials or aggressive chemicals when cleaning your keycaps. These can degrade the text on the caps or damage the plastic. Stick to mild detergents and soft brushes or cloths. Patience is key – don’t rush the drying process, as any moisture can lead to damage once the keycaps are reattached. Proceed to the next step only when the keycaps are fully dry.
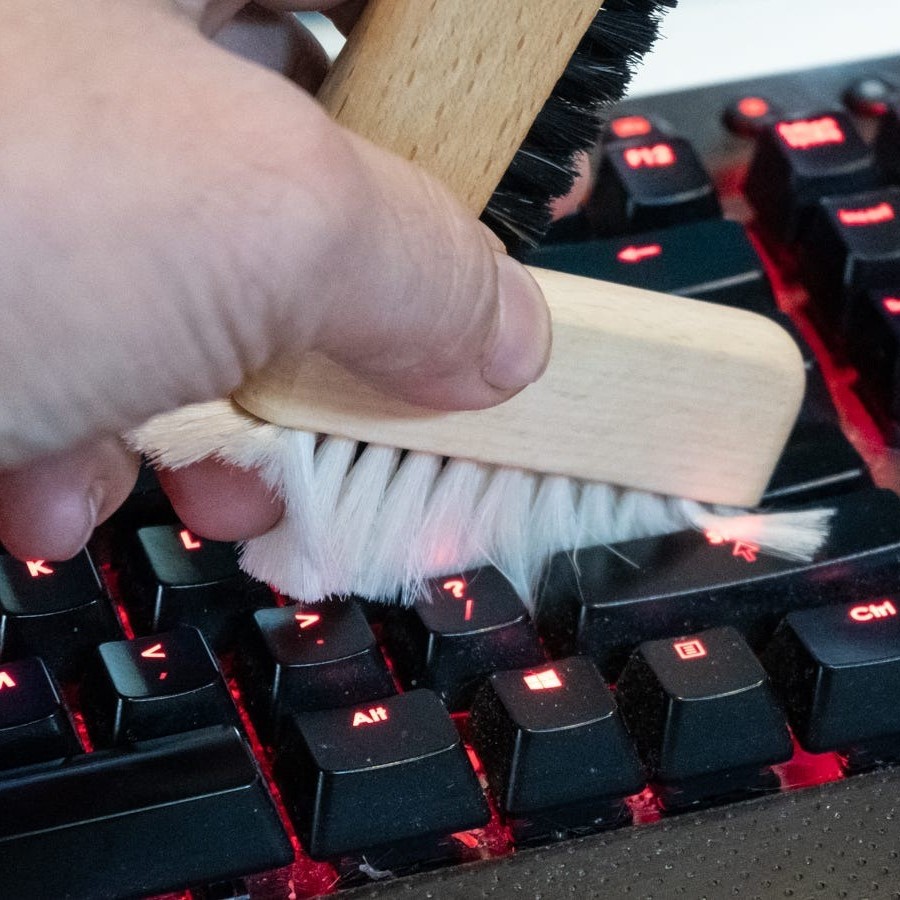
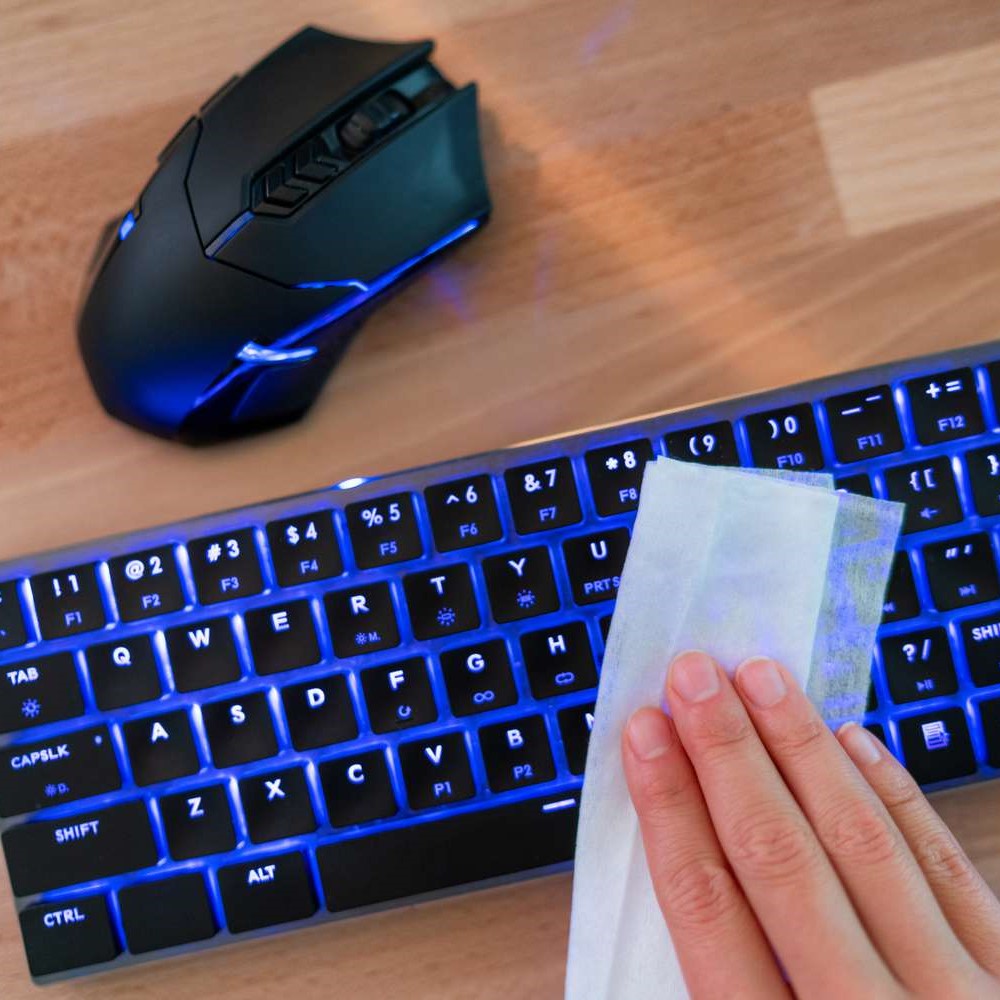
 Step 3: Dusting the Keyboard Deck
After you remove the keycaps, you will see dust and debris on the keyboard deck. Dusting is vital to prevent buildup that can affect the keyboard’s function. Here’s how to clean a mechanical keyboard deck properly:
- Use Compressed Air: Hold the can upright and spray between the switches. Compressed air dislodges dust and small particles.
- Go Over with a Soft Brush: A soft, small brush can sweep away any remaining dust. Brush gently along the surface and in between the switches.
- Wipe Down with Microfiber Cloth: Dampen a microfiber cloth with isopropyl alcohol. Then, wipe the area gently to clean off stubborn dirt. Remember to use the cloth lightly to avoid moisture entering the switches.
Take your time when dusting the keyboard deck. Be thorough but gentle to avoid damage. Use tools correctly and do not let any liquids drip inside. Dusting helps maintain the keyboard’s responsiveness and keeps the switches working well. Once the deck is clean, move on to the next step of addressing spills and stains.
Step 4: Addressing Spills and Stains
Spills and stains can damage a mechanical keyboard if not addressed quickly. To clean up a spill, first unplug the keyboard. Do not use a hairdryer or heat gun, as this may warp the plastic. Instead, turn the keyboard upside down. This helps liquids leave the keyboard. Use a microfiber cloth to gently blot the spill. Be careful not to push liquids further into the keyboard.
For stains, make a solution of isopropyl alcohol and water. Dip a cotton swab in the mixture. Then, dab at the stain. Avoid rubbing, as this could spread the stain or damage key switches. You can also use a soft toothbrush to gently scrub the area.
Once you clean up spills and stains, leave the keyboard to air dry. This may take several hours. Make sure the keyboard is completely dry before reattaching any keycaps. This step is critical to prevent short circuits.
Cleaning spills and stains off your keyboard can be nerve-wracking. Go slowly, use the right tools, and don’t rush. A careful approach will help you avoid further damage to your mechanical keyboard.
 Step 5: Lubricating the Switches
Lubricating the switches is a critical step in mechanical keyboard maintenance. It ensures keys press smoothly and quietly. For this, you will need the right kind of lubricant. Most people use a specialized keyboard lubricant found in online stores. Here’s how to clean a mechanical keyboard by lubricating the switches properly:
- Choose the Right Lubricant: Select a lubricant made for keyboard switches. It should not be too thick or runny.
- Apply Lubricant Sparingly: Use a small brush or the end of a cotton swab. Dip it lightly in lubricant and apply a thin layer to the switch stem. Do not over-lubricate as it can attract more dirt or cause other issues.
- Work on Each Switch: Go switch by switch. Take your time to apply the lubricant evenly. Be methodical to ensure no switch gets overlooked.
- Test the Keys: After lubricating, press each key to ensure they move smoothly. Listen for any uneven sounds that may indicate too much or too little lubricant.
Space the lubrication sessions out. Only lubricate when keys begin to feel sticky or sound noisier. Over-lubrication is counterproductive and can reduce the lifespan of the switches. Take care while applying lubricant. Keep it away from the switch housing to prevent short circuits.
With all switches lubricated, you have almost completed the cleaning process. The final steps are reassembling the keyboard and conducting any additional maintenance checks. By now, your keyboard should feel and perform as if it’s brand new. After reassembling, we will move on to some tips for regular upkeep.
 Reassembling Your Mechanical Keyboard
After cleaning and lubricating each part of your mechanical keyboard, it’s time to reassemble it. Piecing your keyboard back together should be a careful and deliberate process. Here are the steps to follow:
- Start with the Keycaps: Begin by placing the keycaps back onto the corresponding switches. Press them firmly yet gently until they click into place. Pay attention to the orientation of the keys, especially for those with unique shapes like the spacebar, enter, and shift keys.
- Check the Stabilizers: Make sure the stabilizers for the larger keys are correctly positioned. They should allow the keycaps to sit flat and move evenly when pressed. If a key feels off, gently remove the cap and adjust the stabilizer.
- Reconnect the Keyboard: Once all keycaps are securely in place, it’s time to hook your keyboard back up. Connect the cable to your keyboard and then to your computer or device.
- Test the Functionality: Press each key to ensure they all respond as expected. Typing out a few sentences or using a keyboard testing tool online can help you identify any issues.
- Make Adjustments as Needed: If you find a key is sticking or not registering, disconnect the keyboard again. Remove the keycap and check for any problems. Addressing these small issues now can prevent larger problems later.
Your mechanical keyboard should now look clean and feel responsive after its thorough maintenance. This is the result of your efforts on how to clean a mechanical keyboard correctly. As you become more familiar with this process, reassembling will become faster and easier.
Tips for Regular Mechanical Keyboard Upkeep
When you know how to clean a mechanical keyboard, upkeep becomes simple. Regular maintenance can prevent major cleaning sessions later on. Here are some practical tips that will help:
- Do Quick Dust-Offs Weekly: Use a soft brush or compressed air to lightly dust your keyboard. This prevents dust build-up between thorough cleans.
- Wipe Surface Regularly: Gently wipe your keyboard with a dry microfiber cloth. Do this every few days to remove finger oils and surface dirt.
- Avoid Eating Over the Keyboard: Crumbs can get into the switches. Try to keep food away from your work area to prevent this.
- Wash Hands Before Use: Clean hands mean fewer oils and less grime on your keys. Make it a habit before typing.
- Cover When Not in Use: Dust covers can protect your keyboard from the everyday dust in the air.
- Monitor for Key Stickiness: If keys feel sticky, it might be time for a deep clean or to reapply lubricant on the affected switches.
- Stay Alert for Unusual Noises: Listen for changes in key sounds. This could suggest it’s time for maintenance.
By integrating these habits, you’ll extend your keyboard’s life and performance. Remember, taking good care of your mechanical keyboard pays off. It keeps typing a joy and helps avoid costly repairs or replacements. Aim to incorporate these tips into your daily routine.
 Conclusion: Benefits of Regular Maintenance
Now that you know how to clean a mechanical keyboard, let’s reflect on the benefits. Regular cleaning does more than keep your keyboard looking good. It also enhances its performance and extends its lifespan.
- Avoids Key Sticking: With routine care, keys continue to press smoothly.
- Prevents Dirt Build-Up: Regular dusting means less grime in the long run.
- Maintains Resale Value: A well-kept keyboard can fetch a higher resale price.
- Reduces Repair Costs: Upkeep minimizes the need for repairs or replacements.
- Improves Hygiene: Clean keyboards mean less bacteria and germs.
- Enhances Typing Experience: A responsive keyboard improves typing speed and accuracy.
Overall, the effort put into maintaining your keyboard pays off. It leads to a more pleasant and efficient typing experience. Remember, small, consistent actions can prevent big issues. Keep your keyboard in prime condition and it will serve you well for years to come.